
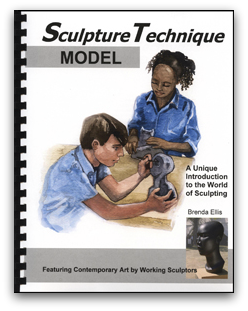
This spring the TOS Homeschool Review Crew was offered the opportunity to review a book from a large selection of ARTistic Pursuits books. I expressed an interest in one of their newest books, Sculpture Technique: Model.Their other brand new book is called Sculpture Technique: Construct. Happily, I got to review the book I asked for!
Let me start by telling you why I like ARTistic Pursuits. The center of my homeschooling curriculum regularly focuses around a free online curriculum called Ambleside Online. It includes a subject section of Artist Study, which I regularly fail to do. In addition, when I do Artist Study, I regularly neglect to let my son do the hands-on aspect of art. I hate the mess, I'm uninspired, and it is easier just not to do it.
ARTistic Pursuits, though, weaves a beautiful balance between studying artists and then doing hands-on art projects that relate to the artist you are studying. I remember fondly from previous years days when we sat together with our ARTistic Pursuits book on our lap, quietly studying great pieces of artwork (paintings, usually), and then being taught and challenged to do a new art technique, often out of my comfort zone. I love the way these books teach use of art pencils (with gum erasers), chalk pastels, paints and blending of colors.
So our new book that we received for this review, Sculpture Technique: Model, is separated into three sections based on creating sculptures with three entirely different types of mediums. The first section, entitled "Unit 1: creating mass with putty" (stet - not capitalized), focuses on using Durham's Rock Hard Water Putty, which is a real hardware-store item. Who would have thought? "Unit 2: creating scale in clay" focuses on sculpture techniques with clay (real clay, not the stuff I had been buying from the local craft store). "Unit 3: creating surface with fiber" focuses on sculpture with felting of wool.
I had to go into my basement and pull out the art supplies that I inherited from my dad and gram to see what I already own,
so I wouldn't waste money buying duplicates.
so I wouldn't waste money buying duplicates.

Then I pulled up the Dick Blick Art Supplies website to order materials; the instructions for doing this are on the Artistic Pursuits website and in the Sculpture Technique: Model book. I made selections to work on Section 2, clay. After agonizing over decisions, I placed my order, but was dismayed when I realized that it might be a week or more until my supplies arrived.
As the days ticked by, I continued to peruse the Sculpture book, wishing we could start. I finally talked to my hubby and asked him if he thought he could swing by a hardware store and pick up some of the Durham's Rock Hard Water Putty. He checked out the price and said, "Sure. No problem." So the next night when he got home from work, he had it with him.
The next day we had a morning appointment an hour away from home, so we couldn't start right away, but I was chomping at the bit. When we got home from the appointment, go figure! The box had arrived from Dick Blick! So now it was like Christmas. We went inside, and my son was opening the box like a present! Forget the water putty. So Miner was immediately diving into clay. So we were back to Unit 2.

Unit 2 teaches many techniques for working with the clay and making the various types of sculptures. It begins with a discussion about "scale", and then discusses properties of clay and introduces the tools and equipment for working with clay. Safety and basic instructions are given, and then the first technique is presented. The first clay technique presented is the pinch-pot method. My son dug in and created a little pitcher creation, without reading the instructions. He didn't make it as thick-sided as he should, but didn't want to change it, so we let it dry.

We currently have three dogs in a small house, and through their
rambunctious play a brass sculpture of a giraffe fell onto the first art
project and it broke, but fortunately we had photographed it before the
accident.


The second project in the book is called "create a sculpture." Miner dived right in (again without reading) and created a lovely sculpture, that is a miniature, in scale, of a wood sculpture we have in our house. This lesson also teaches the safe method for joining two pieces of clay in a sculpture, but he didn't use this joining method with his project. It's tiny.


The next section teaches how to use the slab method. Miner was not inspired and did not proceed. I loved the instructions for it, though. We still have Lincoln Logs downstairs, and if you take two roof slabs from the Lincoln Logs and put one on the left and one on the right, parallel, you can roll your lump of clay down to a uniform thickness for creating your clay slab. I totally would never have thought of that! Now I'm trying to figure out how I can use that method to make a pie crust (the rolling pin isn't long enough)!
Once you have your slab, you can take empty tubs or cans to shape the clay - TP or paper towel tubes, soup cans, empty canister from oatmeal, or even make your own cardboard or newspaper tube. There are cool ideas for decorating the slab by pressing in a paper doily! You are taught how to cut straight lines using a straight edge. I can't even tell you all the cool techniques it teaches you! It is just so cool!
The next small section is "more techniques to explore", with some amazingly creative ideas. "Slip" is introduced (wet, runny clay base). Instruction is given for burnishing and etching. And then Project 6 introduces using the "Slab Method with Paper Armature". These sculptures techniques are really cool. You make an armature of newspaper to create the hollow sculpture over. This method is what made me think Miner's little sculpture needed to be hollow, but I think it didn't need to be because Miner's project was so small.
Project 7 introduces "Coil Method". Miner has done coil method before, with other home-made and non-drying play clays, and inspite of the amazing sculpture examples in the photos, he was by this time resisting my efforts to present the material. The book shows using the coil method to create a small bear sculpture, a cute rabbit sculpture... By this time Miner was making... "brick sculpture".
I have the paints, the supplies, to finish some really nice clay projects... and he is making home made terra cotta bricks and building walls. ::sigh::

Moving on... Finally worked in Unit 1. First project was to make a lump of putty the consistency of Play Dough,


It turned out very well! It might get painted some day. There were more projects in Unit 1 that we haven't done yet. I don't really have to tell you all the projects available in this book because the ARTistic Pursuits website shows you the table of contents page here (click page):

I can say right now that my student didn't enjoy his art exposure as much as I had hoped he would. He generally likes to decide what he works on and when... And he doesn't seem to enjoy the wonderful things the Crew makes available to us to try out. Ah well! I don't mind! I love this art book, and I'm really looking forward to diving into Unit 3. I'll let him play, too, if he changes his mind.
Unit 3 teaches how to create sculptures by felting wool. I don't yet have the supplies to complete that unit, but I will get them soon and I will totally enjoy learning how to felt. It is something I have long wanted to learn how to do. I am totally looking forward to it.
The nitty gritty: Sculpture Technique: Model is intended for students ages 11 to 18. It is a soft-cover, plastic-spiral-bound book with a clear, plastic protective cover. The book is 83 pages long, printed on one side only. (I don't know why the pages are not printed on both sides, but the book is very high quality with thick paper.) The book has three units. Each unit has four projects, and a unit evaluation. The price of Sculpture Technique: Model is $47.95.
If you have an older student and you think Sculpture Technique: Model sounds like a good fit, give it a try. The thing to remember is that when you have the book in hand, you still need to purchase materials. You can do it the way I did, and spread the acquisition out over time, or you can buy them all at once.
I loved Sculpture Technique: Model, and I am always thankful when I get the opportunity to review a product by ARTistic Pursuits!


No comments :
Post a Comment